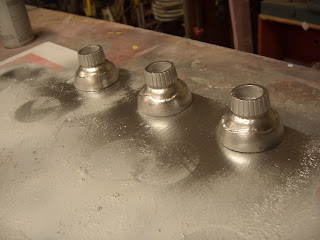
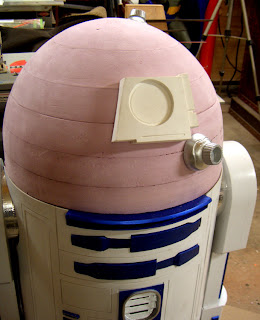
The last couple of days have shot by in a blur. I worked as quickly as possible to finish my little side project so that I could take it to a show near St. Louis with some other pieces of my work. The bulk of the work on the dome began with: coating the foam with a couple coats of primer and then bondo. It was a bit like being "cake boss"
This was sanded (shhh...Dan...sometime I have to sand) and then spot filled, and then sanded again..and then primed
In the meantime, I also completed some work on other parts needed:
Azek pvc to the rescue!
Eventually, I moved to painting the dome, and then making sure everything was secure. On friday morning, I took him outside for the first time to take a few pictures. Isn't it amazing what some scrap pieces of HDU, wood, pvc and glue can become in such a short time?
I had a couple minutes to look at him, then loaded him up to head to the show. He was instantly a "photo opportunity" at our booth and led to much discussion about the other work I do. It was a great time and thanks to Jason Allen for inviting me. Enjoyed meeting some new people and generally getting to talk shop. I love my CarveWright and have quickly become a fan of ShopBot. I'm just at the beginning of this journey, and feel very fortunate to have met so many great people in such a short time.
Saturday, February 9, 2013
Wednesday, February 6, 2013
Up Top
Today I had to do some cleanup in the shop. Things had gotten pretty crazy, and I have to work on some signs soon, and prefer to do it in a clean shop. While I was cleaning, the carving machine was busy.
The dome was carved in 6 pieces, each 2" thick. It's looking good, so next I'll give it a hard coat.
I also carved up lots of pieces for the dome. There are 3 "eyes" and one large thing called the holographic projector. Lastly a long "window".
The dome was carved in 6 pieces, each 2" thick. It's looking good, so next I'll give it a hard coat.
I also carved up lots of pieces for the dome. There are 3 "eyes" and one large thing called the holographic projector. Lastly a long "window".
Tuesday, February 5, 2013
Time to get a head
Just a quick update.
I did a test fit of everything this morning. It's looking pretty good. I still need to hook up the battery boxes and attach the hoses on the feet...but now it's time to start on the dome.
Here he is with battery boxes and hoses...
I did a test fit of everything this morning. It's looking pretty good. I still need to hook up the battery boxes and attach the hoses on the feet...but now it's time to start on the dome.
Here he is with battery boxes and hoses...
Monday, February 4, 2013
Footloose...footloose
I made some good progress over the weekend.
I created a piece that R2D2 fans call his "skirt" on the bottom of the body. In this picture I have his body turned up side down in order to put the piece in place.
I also worked on a couple other parts that go near the feet called the "battery boxes". I still need to put skin on them, but the structure is complete. Here it is next to the foot shell...the battery box is on the left. The open hole on the bottom will be covered and have two holes for the hoses to enter from the feet.
Lastly, I had to make the internal portion of the foot that holds the wheels, and all of the weight of the little fella. This was made from a multi-layer plywood for strength. Aluminum would have been great, but I'm keeping the cost reasonable on this little guy, so wood it is. I put the foot shell next to it, just so you could get an idea of how that fits.
I need to pick up a couple bolts that are the right size to connect the foot to the leg permanently, then I can add the shells and put it all together once I have the skin on the battery boxes. Sometime tomorrow I hope to be able to show the whole thing minus the dome on top! It's exciting to see it come all together!
Friday, February 1, 2013
It's Only Fitting.
On R2's feet, there are 4 hoses. They are connected to the feet with these little knurled connectors. They are not things you can get off the shelf. So, I could either try to buy a set from other R2 builders who've had them made, or figure out something on my own.
I spent a little time at the hardware store getting some bolts- and while there I was looking at these nifty air hose connectors that swivel:
The piece in the middle, I realized, was very very close to what I needed. Unfortunately, they are not knurled. What the heck is knurling? Good question. It's the pattern on the left that you see here:
I quickly realized that I could make it work. The diameter of the center piece was a little small, but my solution would fix both issues. I disconnected the center piece from the other parts, and then mixed up a very small amount of Magic Sculpt epoxy putty. I rolled it very thin, and then wrapped the base of the connector. Next, I pulled out my Torque wrench. Torque Wrench? Yes. It has a large knurled handle. I rolled the magic sculpt covered piece carefully around the handle...transferring the knurled texture to the putty.
Once it was dry, I beveled the edge on top, and primed and painted it. 3 more to go! To attach it, I'll simply use the original piece from the bottom, screwed in through the hole in the foot cover, with the hose running through it.
Subscribe to:
Posts (Atom)


